Table of Contents
Papercraft in 2026 isn’t just a nostalgic throwback to grade-school art projects—it’s a full-blown mindfulness movement meets engineering playground. With screen fatigue at an all-time high and the maker economy thriving, more people are turning to the tactile satisfaction of transforming flat sheets into dimensional art. The best part? You don’t need a studio budget to start. The under-$20 kit market has exploded with surprising quality, offering everything from architectural miniatures to posable creatures that would make a origami master nod in approval.
But here’s the catch: not all budget kits are created equal. Some will leave you with flimsy paper, instructions that might as well be ancient hieroglyphics, and a half-finished project that becomes a cat toy. This guide cuts through the marketing fluff to show you exactly what to look for, what to avoid, and how to squeeze every drop of creative value from your hard-earned twenty dollars. Whether you’re hunting for your first kit or helping a curious friend dip their toes into paper engineering, these insights will save you from frustration and maximize your chances of building something you’re actually proud to display.
Top 10 Papercraft Kits For Beginners
Detailed Product Reviews
1. Japanese Origami for Beginners Kit: 20 Classic Origami Models: Kit with 96-page Origami Book, 72 Origami Papers and Instructional Videos: Great for Kids and Adults!

Overview: This comprehensive kit delivers a traditional origami experience with 20 classic models ranging from simple cranes to more intricate designs. The 96-page full-color instruction book provides step-by-step guidance, while 72 high-quality origami papers in assorted sizes and patterns ensure you have enough material to master each fold. The included instructional videos are a standout feature, offering visual learners a modern supplement to the printed diagrams.
What Makes It Stand Out: The dual learning approach sets this kit apart. While most kits rely solely on printed instructions, the video tutorials provide real-time folding demonstrations that help clarify complex steps. The paper selection includes both traditional washi patterns and solid colors, giving folders options for authentic Japanese aesthetics. The projects progress logically from beginner to intermediate difficulty, making it truly suitable for both children and adults seeking skill development.
Value for Money: Priced competitively with other beginner kits, this offers exceptional value through its multimedia instruction and generous paper supply. Comparable kits with video content often cost 30% more. The 72 sheets provide approximately 3-4 practice attempts per model, which is ideal for skill building. When factoring in the digital content and quality paper variety, this kit punches above its weight class in the sub-$20 category.
Strengths and Weaknesses: Pros: Excellent video instruction support; good paper variety; progressive difficulty builds confidence; suitable for wide age range. Cons: 20 projects may feel limited for advanced beginners; paper size variety could be better explained; video access requires internet connection. Some users report the book’s binding makes it difficult to lay flat while folding.
Bottom Line: This is an ideal starter kit for families or individuals who benefit from visual learning. The video instructions justify the purchase alone, making it our top recommendation for those who want more than just a book. Perfect for gift-giving.
2. Easy Origami (Dover Origami Papercraft)over 30 simple projects
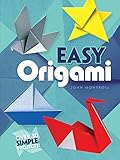
Overview: Dover Publications’ straightforward origami book focuses on simplicity and accessibility, offering over 30 projects that require no prior folding experience. This budget-friendly option emphasizes fundamental techniques through clear, line-drawn diagrams rather than flashy presentations. The projects include traditional favorites like hats, boats, and simple animals that can be completed with standard square paper you likely have at home.
What Makes It Stand Out: The Dover approach prioritizes clarity over complexity, making it perfect for absolute beginners who might feel overwhelmed by elaborate kits. The book’s compact size makes it highly portable, and the minimal supply requirements mean you can start folding immediately without specialized paper. The instructions use universal symbols and logical progression, teaching foundational skills that transfer to more advanced origami later. Its reputation for reliability spans decades.
Value for Money: As one of the most affordable origami resources available, this book delivers remarkable value. Typically priced under $10, it costs less than most kits while offering more projects. Since it doesn’t include paper, you’re free to use inexpensive copy paper cut into squares, making the total investment minimal. For budget-conscious buyers or those unsure about committing to origami, this is the lowest-risk entry point available.
Strengths and Weaknesses: Pros: Extremely affordable; no proprietary supplies needed; excellent for true beginners; portable format; time-tested instructions. Cons: No included paper means extra prep work; black-and-white diagrams lack visual appeal; paper quality recommendations not provided; no video support. Some projects may feel too simple for quick learners.
Bottom Line: If you want to test the origami waters without financial commitment, this book is unbeatable. It’s best for self-motivated learners and those who don’t mind sourcing their own paper. A no-frills, reliable choice for elementary-aged children and adults alike.
3. Amazing Origami Kit: Traditional Japanese Folding Papers and Projects [144 Origami Papers with Book, 17 Projects]

Overview: This kit emphasizes quantity and quality of materials over project variety, bundling an impressive 144 origami papers with a book featuring 17 traditional projects. The papers include authentic Japanese patterns and varying sizes, making it appealing to those who value aesthetic authenticity. The instruction book provides clear diagrams for classic models including flowers, animals, and decorative boxes that showcase the beautiful paper designs.
What Makes It Stand Out: The massive paper supply is this kit’s defining characteristic—144 sheets allow for extensive practice and experimentation without fear of running out. The traditional Japanese patterns are more sophisticated than typical beginner kits, producing finished models that look genuinely artistic. The “Used Book in Good Condition” designation suggests this might be a budget-friendly option for accessing premium papers that would cost significantly more if purchased separately.
Value for Money: Despite the used book caveat, this kit offers solid value for paper enthusiasts. The sheer volume of quality origami paper, often worth $15-20 alone, makes the included instruction book essentially free. With 144 sheets, you get over 8 practice attempts per project, ideal for perfectionists. However, with only 17 models, you may exhaust the designs before the paper, requiring supplemental instruction sources.
Strengths and Weaknesses: Pros: Exceptional paper quantity; beautiful traditional patterns; good paper quality; cost-effective for material-focused folders. Cons: Limited project variety; used book condition may vary; fewer models than comparable kits; lacks multimedia instruction. The discrepancy between paper volume and project count creates an imbalance for some users.
Bottom Line: Best for folders who prioritize beautiful papers and repeated practice over design diversity. The used book status requires tolerance for potential wear, but the paper value is undeniable. Ideal for intermediate beginners ready to focus on precision.
4. Classic Origami for Beginners Kit: 45 Easy-to-Fold Paper Models: Full-color instruction book; 98 sheets of Folding Paper: Everything you need is in this box!

Overview: This kit maximizes project variety with an impressive 45 different models, making it one of the most comprehensive beginner collections available. The full-color instruction book provides visual clarity for each step, while 98 sheets of origami paper ensure adequate practice material. The “everything in the box” promise delivers a complete, self-contained experience requiring no additional purchases or preparation, perfect for immediate gratification.
What Makes It Stand Out: The 45-model library is substantially larger than typical beginner kits, offering weeks of folding without repetition. The models span categories from simple geometric shapes to recognizable animals and functional objects, maintaining engagement through variety. The full-color photographs of completed projects provide motivation and clear target references. The balanced ratio of paper to projects (roughly 2 sheets per model) encourages mastery without waste.
Value for Money: This kit represents excellent mid-range value, typically priced between $15-20. The extensive project library alone justifies the cost, equating to less than 50 cents per model instruction. While it lacks video content, the sheer volume of designs surpasses kits costing significantly more. The included paper quality is adequate for learning, though serious folders may eventually upgrade to premium sheets for display pieces.
Strengths and Weaknesses: Pros: Unmatched project variety; full-color instructions; complete kit convenience; good progression of difficulty; excellent engagement value. Cons: No video tutorials; paper quality is functional but not exceptional; storage box could be more durable; some models feel similar to each other. The high project count may overwhelm those wanting a quicker start.
Bottom Line: The best choice for beginners who want maximum variety and hate running out of projects. The 45-model library ensures long-term engagement, making it perfect for curious minds who like options. Highly recommended for gift-giving to creative children.
5. Ultimate Origami for Beginners Kit: The Perfect Kit for Beginners-Everything you Need is in This Box!: Kit Includes Origami Book, 19 Projects, 62 Origami Papers & Video Instructions

Overview: This kit positions itself as the definitive starting point for origami novices, combining traditional printed instructions with modern video support. The package includes a full-color book, 62 origami papers, and access to video tutorials covering all 19 projects. The curated selection focuses on essential models that build fundamental skills progressively, from basic bases to complete figures like cranes, frogs, and flowers that deliver satisfying results.
What Makes It Stand Out: The “Ultimate” branding reflects its hybrid instruction method, blending physical and digital learning. The video component provides close-up views of tricky folds that static diagrams often fail to convey. The paper selection includes practice sheets and display-quality patterned paper, teaching beginners when to use which type. The kit’s compact packaging and organized approach reduce the intimidation factor for absolute novices.
Value for Money: Positioned as a premium beginner kit, it typically costs $18-22, justified by the video content and curated experience. While it offers fewer projects and papers than some competitors, the quality-over-quantity approach ensures successful first folds. The video access adds significant value, effectively providing personal instruction without the cost of classes. For learners who’ve struggled with diagram-only methods, this premium is well worth it.
Strengths and Weaknesses: Pros: Professional video instruction; excellent curation for true beginners; quality paper variety; builds skills systematically; reduces frustration. Cons: Higher price point; fewer projects than comparable kits; video access may expire; paper count limits practice attempts. The “ultimate” claim may oversell its scope for fast learners who quickly outgrow the 19 models.
Bottom Line: Perfect for beginners who’ve tried and failed with traditional origami books. The video instruction is the game-changer here, justifying the premium price. Ideal for adult learners and teens who benefit from visual demonstration. A frustration-free entry point.
6. Origami Flowers Kit: 41 Easy-to-fold Models - Includes 98 Sheets of Special Origami Paper (Kit with Two Origami Books of 41 Projects) Great for Kids and Adults!

Overview:
This specialized kit focuses exclusively on floral origami, offering 41 different flower models across two instruction books. With 98 sheets of dedicated origami paper included, it provides everything needed to create a botanical paper garden. Designed for both children and adults, the kit emphasizes easy-to-fold models that build confidence while producing beautiful results.
What Makes It Stand Out:
The singular focus on flowers distinguishes this from general origami kits. Rather than scattered projects, you get a cohesive collection of botanical designs that can be arranged into displays, used for cards, or given as gifts. The dual-book format likely separates simpler blooms from more complex arrangements, creating a natural learning progression.
Value for Money:
With nearly 100 sheets of paper and two full guides, this kit offers substantial content. Purchasing origami books and specialty paper separately would easily cost 30-50% more. The specialized nature means you’re getting targeted expertise rather than generic projects.
Strengths and Weaknesses:
Strengths include the thematic consistency, ample paper supply, and age-inclusive design. Weaknesses may include limited variety for those seeking non-floral projects, and the “special” paper quality isn’t specified. The focus on easy models might disappoint intermediate folders seeking challenge.
Bottom Line:
Perfect for flower enthusiasts and those wanting a cohesive crafting experience rather than random projects. It makes an excellent gift for crafters who appreciate nature-inspired art, though dedicated origami artists may want more complex challenges.
7. Amazing Origami Boxes: 20 origami models with instructions and diagrams (Dover Crafts: Origami & Papercrafts)

Overview:
This Dover Crafts guide specializes in functional origami, teaching 20 unique box designs from a single sheet of paper each. Created by an origami master, the book progresses from simple containers to complex geometric forms. The step-by-step diagrams and instructions cater to various skill levels, making functional paper art accessible to patient beginners and engaging for experienced folders.
What Makes It Stand Out:
Origami boxes transform paper into usable, giftable objects rather than decorative items alone. The single-sheet constraint showcases clever engineering and mathematical beauty. Dover’s reputation for clear, no-nonsense instruction shines through with meticulously drawn diagrams that origami traditionalists appreciate. Each box becomes a tangible, functional creation.
Value for Money:
Dover publications consistently deliver exceptional value, and this book typically retails for less than $15. While paper isn’t included, standard origami squares work perfectly. Compared to kits, you’re getting master-level instruction at paperback prices, making it ideal for those with existing paper supplies.
Strengths and Weaknesses:
Strengths include practical outcomes, clear diagrams, and skill-building complexity progression. Weaknesses include lack of included paper and potential frustration for absolute beginners without basic folding knowledge. Some complex boxes require precise creasing and patience.
Bottom Line:
An essential addition for origami enthusiasts interested in functional art. It offers exceptional instructional quality at a budget price, though beginners should pair it with basic origami practice before attempting intermediate boxes.
8. Complete Origami Kit: [Kit with 2 Origami How-to Books, 98 Papers, 30 Projects] This Easy Origami for Beginners Kit is Great for Both Kids and Adults

Overview:
Tuttle Publishing’s comprehensive kit provides everything needed to begin and advance in origami. It includes two instruction books, 96 sheets of 6x6 inch paper, and 30 diverse projects ranging from animals to objects. The kit serves both novices and experienced folders, offering a well-curated progression from simple cranes to more elaborate designs like kimonos and ships.
What Makes It Stand Out:
Tuttle’s reputation for authentic, high-quality origami instruction sets this apart. The dual-book structure likely separates beginner fundamentals from intermediate challenges. The paper selection is specifically sized for the projects, eliminating guesswork. The variety—covering animals, vehicles, and traditional models—prevents boredom and builds versatile skills.
Value for Money:
This all-in-one kit eliminates the need to purchase separate materials. Comparable individual components would cost $25-35, while this kit typically retails for less. The Tuttle brand ensures reliable instructions that won’t lead to frustration, representing genuine value for learners.
Strengths and Weaknesses:
Strengths include reputable instruction, balanced project difficulty, and quality materials. Weaknesses may include paper quantity that could be exhausted before mastering all projects, and advanced folders might find the complexity ceiling too low. The 6x6 size limits larger model potential.
Bottom Line:
The ideal starter kit for serious beginners. It combines trusted instruction with quality materials in a single package. While not for experts, it provides the best foundation for developing lasting origami skills and confidence.
9. Fun with Easy Origami: 32 Projects and 96 Sheets of Origami Paper (Dover Crafts: Origami & Papercrafts)

Overview:
Dover’s entry-level kit offers 32 easy projects with 96 sheets of paper, targeting absolute beginners and casual crafters. The collection emphasizes simple, fun folds that produce recognizable results quickly. As part of Dover’s trusted Crafts series, it follows a tradition of accessible, no-frills instruction that prioritizes project completion over artistic complexity.
What Makes It Stand Out:
The “easy” designation is sincere—this kit focuses on building fundamental skills without intimidation. Projects likely include classic models like boats, hats, and simple animals that children can master. Dover’s straightforward diagram style removes ambiguity, making it ideal for self-directed learning or parent-child activities where clear guidance is essential.
Value for Money:
Positioned as a budget-friendly option, this kit typically costs less than specialized alternatives. The included paper adds convenience for those without craft supplies. However, the value depends entirely on paper quality, which isn’t specified. For pure instruction at low cost, it’s competitive.
Strengths and Weaknesses:
Strengths include accessibility, low price point, and sufficient paper for practice. Weaknesses include potentially oversimplified projects that may not challenge users beyond a few sessions. The generic paper might lack the crisp folding qualities of origami-specific paper. No skill progression for advancing beyond basics.
Bottom Line:
A solid choice for young children or adults wanting zero-pressure introduction to paper folding. It delivers exactly what it promises—fun, easy projects. Those seeking artistic growth should view it as a stepping stone rather than a long-term resource.
10. Origami Joy 15 Paper Weaving Project • Anxiety Relief PaperCraft • DIY Placemats with ¾-inch Paper Strips and 9x14-inch Mats • Beginner Learn to Weave • Arts & Craft Kits for Home and Classroom Decor

Overview:
This innovative kit diverges from traditional origami by focusing on paper weaving to create 15 placemat projects. It includes 230 colorful paper strips and 15 pre-cut 9x14 inch cardstock mats. Designed for anxiety relief and fine motor development, it offers a meditative, repetitive craft experience. The materials are pre-cut, eliminating preparation time and making it immediately accessible for beginners, classrooms, or therapeutic settings.
What Makes It Stand Out:
The therapeutic angle is unique—this positions paper craft as mindfulness practice rather than artistic pursuit. The pre-cut components remove barriers to entry, making it genuinely ready-to-use. The functional outcome (usable placemats) provides practical value beyond decorative objects. It’s specifically designed for little hands and stressed adult minds alike.
Value for Money:
While more expensive than simple origami kits, the pre-cut materials justify the cost in time saved. The specialized focus on weaving technique means you’re paying for convenience and therapeutic design. For educators or therapists, the ready-to-use format represents significant value.
Strengths and Weaknesses:
Strengths include immediate usability, mental health benefits, and quality family activity potential. Weaknesses include the limited 15-project scope and fact that it’s not traditional origami, which may disappoint purists. The lightweight mats may not be durable for long-term use.
Bottom Line:
Excellent for specific needs—anxiety management, occupational therapy, or classroom crafts. It’s less about artistic technique and more about process and product. Perfect if you want mindful crafting without folding complexity, but not for origami traditionalists.
Why Papercraft is Booming in 2026
The Mindful Making Movement
The craft renaissance we’re seeing isn’t accidental. In 2026, mental wellness apps are actually recommending analog hobbies as a counterbalance to algorithmic overwhelm. Papercraft occupies a sweet spot: it’s repetitive enough to induce flow state, yet complex enough to demand full attention. Unlike passive scrolling, each fold requires intention. The under-$20 price point makes it an accessible entry point for therapy-seekers and curious creatives alike, offering a low-stakes way to rebuild focus muscles without committing to expensive equipment.
Digital Detox Through Paper Art
What sets papercraft apart from other unplugged hobbies is its stealthy complexity. You’re not just cutting and gluing—you’re reading diagrams, planning sequence, and problem-solving in three dimensions. For beginners, budget kits act as training wheels for spatial reasoning. The 2026 market reflects this shift, with manufacturers designing kits specifically for the “digital refugee” demographic: clearer icons, QR codes that link to video snippets (for when you must use your phone), and projects designed to be completed in single, phone-free sittings.
What Makes a Kit “Beginner-Friendly”
Pre-Cut vs. Cut-Your-Own Patterns
This is the single most important decision for your first kit. Pre-cut kits promise convenience, but they hide a crucial learning curve. In 2026, laser-cutting technology has become so cheap that even sub-$15 kits offer clean die-cuts. However, cutting your own pieces from templates teaches you about paper grain, blade control, and patience—skills that transfer to every future project. Look for kits that offer scored pre-cuts: the pieces are separated but fold lines are pressed, giving you the best of both worlds. If you’re truly starting from zero, a hybrid kit with some pre-cut elements and one sheet to cut yourself builds confidence without overwhelming.
Instruction Quality Matters
A 2026 budget kit lives or dies by its instruction design. The best ones use a universal icon system: solid lines for cuts, dashed for valley folds, dash-dot for mountain folds, and tiny glue bottle icons that point exactly where adhesive goes. Avoid kits that rely solely on photographic instructions—paper glare and shadows make it impossible to see fold directions. Instead, prioritize those with vector-based diagrams that you can zoom into without pixelation if you scan them for digital reference. Some forward-thinking brands now include “common mistake” callouts in margins, showing you what a misaligned tab looks like before you commit glue.
Time Commitment Expectations
Let’s be brutally honest: that “30-minute project” on the box is marketing fiction for anyone without papercraft muscle memory. In reality, factor 2-3x the stated time for your first three kits. A $12 animal figurine kit might claim 45 minutes, but you’ll spend 20 just organizing pieces and decoding the first three steps. The sweet spot for beginners is kits advertising 60-90 minutes. They’re complex enough to feel substantial but won’t become a weekend-eating monster when you hit a confusing step. Check the piece count: 20-40 pieces is ideal for a first build.
Understanding the $20 Price Point
What You Can Realistically Expect
In 2026, $20 buys you surprising sophistication. At this price, you’ll get 8-12 sheets of 200-250gsm paper (that’s cardstock weight, not flimsy copy paper), full-color double-sided printing, and a glue stick or double-sided tape. You won’t get specialized tools or metal-reinforced joints, but you should expect registration marks that actually align and packaging that doubles as a sorting tray. The real value lies in pattern density: premium designers now fit multiple mini-projects on one sheet, so a single kit might yield a main model plus tiny accessories.
Hidden Costs to Watch For
That attractive $18 kit can quickly become a $30 investment if you’re not careful. Tool-free kits are rare in the budget tier; most assume you own a craft knife, cutting mat, and metal ruler. If you’re starting from scratch, a basic tool trio adds $12-15. Glue is another gotcha—kits include tiny tubes sufficient for that project but not for mistakes. Factor in a $3 backup glue stick. Then there’s the “frustration tax”: when instructions are poor, you’ll waste paper reprinting blown PDFs. Some 2026 kits lock digital backups behind QR codes that expire after 30 days. Always check if the manufacturer offers permanent digital access.
Where Your Money Actually Goes
Paper costs have stabilized in 2026, but printing remains the budget killer. A $16 kit typically allocates: $4 for materials (paper, packaging), $3 for licensing if it’s a branded character, $5 for design and pre-press, $2 for distribution, and $2 profit. This explains why original-design kits from indie creators often feel more generous than licensed kits at the same price—they’re not paying IP fees. When you buy from small-batch designers on platforms like Etsy or niche craft sites, more of your money funds better paper and clearer instructions rather than franchise overhead.
Essential Features to Evaluate
Paper Weight and Quality
Paper weight is measured in gsm (grams per square meter), and this number is your best friend. For 3D models, 200-250gsm is the beginner sweet spot—stiff enough to hold shape but forgiving enough to refold if you mess up. Anything below 180gsm will warp under glue and collapse under its own weight. In 2026, look for “sustainably sourced” or “FSC-certified” markings; budget doesn’t have to mean environmentally reckless. Hold the paper up to light: you should see minimal show-through from the opposite side’s print, indicating quality ink saturation that won’t bleed when glued.
Printing Clarity and Color Accuracy
Budget kits often cheap out on registration—the alignment of colors and cut lines. Before buying, check product photos for reviews that show close-ups of the actual sheets. Blurred lines where color meets cut indicate low-resolution printing, which makes precise cutting nearly impossible. In 2026, the best budget kits use UV-cured inks that won’t smudge when handled. For designs with intricate patterns (like floral kits), look for “color bleed protection” in descriptions—this means a white underbase layer prevents colors from muddying when folded.
Tool Inclusion vs. Tool-Free Kits
Some 2026 kits include a tiny snap-blade knife and micro-glue pen, which feels generous but often backfires. These tools are usually low quality—the knives dull after three cuts, and the glue pens clog instantly. You’re better off with a tool-free kit that admits you’ll supply your own decent equipment. Exception: kits that include specialty tools like embossing styluses or tweezers with angled tips. These are worth the slight price bump because they’re hard to source cheaply elsewhere and dramatically improve precision.
Kit Types and Complexity Levels
3D Models vs. Flat Art
Flat art kits (greeting cards, wall decor) teach precision cutting and layering but don’t develop spatial reasoning. 3D models (boxes, figurines, geometric sculptures) force you to understand how 2D nets become volumes. For true beginners, start with a “2.5D” kit—something with relief depth but still wall-mounted, like a shadowbox scene. These build confidence in folding without the engineering challenge of freestanding structures. By your third kit, graduate to a simple freestanding model with 5-10 faces.
Figurines and Character Models
Character kits are catnip for beginners but harbor unique challenges. Joint alignment is critical—a millimeter error in a limb socket makes your cute animal look like it’s had a rough night. In 2026, the best budget character kits use “tab-and-slot” joints that allow repositioning before final gluing. Avoid kits with more than six articulated parts for your first build. Look for “poseable” in descriptions, which usually means wire armatures are included. Without this, paper limbs sag within days.
Architectural Miniatures
Tiny buildings are the hidden gems of budget papercraft. They teach systematic assembly—walls before roofs, interiors before exteriors—and reward patience with impressive results. At under $20, you’ll get single-room structures or façade kits rather than full houses. The key feature to demand is interior detail: a café kit should have visible countertops and chair outlines through windows, not blank walls. Check if the kit includes “glazing” sheets (clear acetate for windows); this tiny addition elevates the final piece from craft fair to display case.
Floral and Nature Themes
Paper flowers have surged in popularity for event decor, and budget kits now offer surprising realism. The critical feature here is “shape memory”—paper that holds a curl without cracking. Look for kits specifying “textured cardstock” or “crepe-paper hybrid.” These use fiber blends that mimic real petals’ pliability. For beginners, avoid kits with more than three petal shapes; you’ll spend hours sorting identical pieces. The best value kits include a shaping mat and ball stylus, letting you cup petals properly without buying additional tools.
Skill-Building Progression
Starting with Scored Fold Lines
Scored lines are the training wheels of papercraft, and in 2026, even cheap kits get this right—when they bother to include it. The score should be a shallow depression, not a cut. Test it: bend the paper both ways; it should naturally want to fold along the score. If you’re cutting your own, invest in a scoring tool (a $4 bone folder or even a dried-up ballpoint pen). Never score from the printed side; always flip and score the back to avoid visible crease marks on your finished piece.
Working with Glue Tabs
Glue tabs are the unsung heroes of structural integrity. Beginner kits should have tabs that are at least 8mm wide—anything narrower is unforgiving. Look for “serrated edge” tabs in 2026 designs; these tiny zigzags increase surface area and grip. Apply glue sparingly: a 1mm bead is plenty. Use tweezers to hold tabs while positioning; finger oils weaken adhesive bonds. The pro move is “dry fitting” first—assemble without glue to check alignment, then disassemble and glue one joint at a time.
Understanding Registration Marks
Those tiny crosses and circles printed on pieces aren’t decorative—they’re alignment guides. In quality kits, they match perfectly between adjacent parts. When scanning reviews, look for builds where corners meet cleanly; misaligned registration marks create gaps. Some 2026 kits now use “smart marks” that disappear after gluing, hidden under tabs. This is a sign of thoughtful design. If marks are missing or faint, print quality is suspect, and you’ll fight alignment issues throughout the build.
Common Beginner Pitfalls
Choosing Overly Ambitious Projects
The number one killer of papercraft enthusiasm is picking a kit with 100+ pieces for your first build. Your brain isn’t yet wired for the mental juggling required. Stick to 20-40 pieces, even if the final model looks “simple.” Complexity hides in unexpected places: a 30-piece geometric lamp shade is harder than a 50-piece box with straight seams. Check the “piece efficiency” rating in reviews—how many pieces are hidden structural supports versus visible detail? High visible-detail-to-piece ratios often indicate smarter, not harder, design.
Ignoring Paper Grain Direction
Paper has a grain, like wood, and folding against it causes cracking and weak joints. Hold a strip of paper at both ends and gently bend; it will resist more in one direction—that’s against the grain. Quality kits print grain direction arrows on the sheet margins. If they don’t, test a scrap piece before committing. For curved pieces, always fold with the grain. This single awareness can elevate your finish from craft store to gallery quality.
Skipping the Dry Fit Stage
Dry fitting—assembling without glue—feels like wasted time when you’re eager to see results. It’s not. This is where you catch design flaws, misprinted pieces, and sequence errors. In 2026, some kits include a “test piece” sheet of cheaper paper for practice runs. If yours doesn’t, photocopy your sheets first (if copyright allows) and practice on the copies. The 10 minutes spent dry fitting saves hours of prying apart glued mistakes and salvaging torn tabs.
Tools You’ll Need Beyond the Kit
The Non-Negotiable Basic Toolkit
Even “tool-free” kits assume you have three things: a sharp blade, a self-healing mat, and precision glue. For under $20 total, get a snap-blade utility knife (the kind with break-off segments), an A4 cutting mat, and a fine-tip glue pen. The knife should feel like a pencil in your hand; if it’s thicker, you’ll lack control. The mat must be self-healing—regular cardboard dulls blades instantly. Glue pens beat sticks for precision; look for acid-free, quick-tack formulas that set in 30 seconds, giving you just enough time to adjust.
Nice-to-Have Upgrades
Once you’ve completed two kits, consider three upgrades that transform the experience: a metal ruler with a cork backing (prevents slipping), curved-tip tweezers (for reaching into tight spaces), and a light pad (for tracing and checking registration). In 2026, USB-powered light pads are under $15 and make aligning multi-layer pieces effortless. A bone folder, while old-school, creates crisper folds than any improvised tool. These aren’t mandatory, but they reduce frustration by 70%.
DIY Tool Hacks for Budget Crafters
Not ready to invest? Hack your toolkit. A ceramic kitchen tile makes a perfect cutting surface (blades dull faster, but it’s free). A credit card edge works as a bone folder in a pinch. For tweezers, bend a paperclip into a small “L” shape. The most valuable hack is a “glue control station”: squeeze glue onto a scrap piece, then apply with a toothpick instead of directly from the bottle. This prevents the dreaded glue blob that soaks through paper. Keep a bag of rice nearby—dunk finger-tweezers in it to remove sticky residue instantly.
Workspace Setup for Success
Lighting and Ergonomics
Papercraft is a game of millimeters, and shadows are your enemy. Position a desk lamp so light rakes across your work surface at a 45-degree angle; this makes fold lines and cut edges pop visually. Avoid overhead lighting alone—it creates glare on printed surfaces. For ergonomics, elevate your cutting mat to elbow height. You’re not chopping vegetables; precision cutting requires forearm support. In 2026, adjustable-height laptop stands ($10-12) double perfectly as portable craft stations.
Storage Solutions for Small Spaces
Budget kits generate chaos: tiny pieces, half-finished sections, tools. The solution is a “project pizza box”—a shallow cardboard box (like those from frozen pizzas) that holds your current kit, tools, and pieces. When you need the table, slide the whole box under the couch. For longer-term storage, use binder clips to hang partially built sections from a corkboard; this prevents crushing and keeps them visible. Digitize your instructions immediately—scan or photograph them—so you can reference them on a tablet without losing the paper original in the clutter.
Protecting Surfaces from Glue and Cuts
That self-healing mat protects your table from cuts, but glue is sneakier. It seeps under mat edges and bonds with wood finishes. Lay down a silicone baking mat underneath—heat-resistant and non-stick, it catches glue drips and peels clean. For super-budget protection, aluminum foil taped to the table edge works. Always keep a damp (not wet) microfiber cloth within arm’s reach; dried glue on tools is a project killer. In 2026, some crafters use UV-curable resin as a protective tabletop finish, but that’s overkill for beginners. Stick to disposable protection.
2026 Papercraft Trends to Explore
Sustainable and Recycled Materials
Eco-consciousness isn’t just marketing fluff anymore. In 2026, budget kits made from agricultural waste fibers (like bamboo pulp) match traditional cardstock in quality at lower cost. These papers have a subtle texture that hides minor cutting imperfections—a beginner’s secret weapon. Look for “seeded paper” kits where scraps can be planted; they’re slightly more expensive but eliminate waste guilt. The real innovation is soy-based inks that don’t fade and are non-toxic enough that you can craft with kids without ventilation worries.
Augmented Reality Integration
AR isn’t just for video games. Scan a QR code in modern kits and point your phone at the flat sheet; an animation shows exactly how that 2D net becomes 3D. For beginners, this is revolutionary—spatial confusion vanishes when you see the fold sequence in motion. The catch: AR features often require app downloads that harvest data. In 2026, privacy-conscious brands offer web-based AR that works in your browser without accounts. Prioritize these. AR also enables “virtual dry fitting,” letting you preview assembly digitally before cutting physical paper.
Micro-Kits and Mini-Challenges
The 2026 market has embraced “micro-kits”: single-sheet projects that cost $3-5 and take 15 minutes. They’re perfect for skill drills—practice a particular fold type or joint style without committing to a three-hour build. Brands sell them in series of 10, creating a progressive curriculum. For budget-conscious beginners, buying three micro-kits ($9 total) often teaches more than one $18 mega-kit. They’re also portable; craft on a plane tray table or coffee shop corner. The limitation is detail, but the trade-off in lowered intimidation is worth it.
Getting the Most Value from Budget Kits
Repurposing Leftover Materials
A $16 kit with 10 sheets rarely uses every scrap. Those leftovers are free practice material. Cut tiny squares and practice scoring perfect 90-degree folds. Use printed off-cuts to test glue drying times. Some advanced crafters in 2026 are “kitbashing”—combining scraps from multiple budget kits into original creations. A floral kit’s green stems become tree trunks for an architectural kit’s building. Before recycling, sort scraps by color and weight; they become a freebie palette for future experiments.
Joining Online Communities
The papercraft community in 2026 is fiercely supportive, especially for budget kit users. Subreddits like r/papercraft have weekly “Budget Build” threads where members share tips specific to cheap kits. Discord servers host live build-alongs where experienced crafters troubleshoot your progress in real-time. The pro move: join a community before buying your first kit. Post the product link and ask, “What’s the catch?” Veterans will point out flaws invisible in product photos. Many communities also maintain crowdsourced databases rating kits on instruction clarity, not just final appearance.
Documenting Your Progress
Your first build won’t be perfect, but documenting it creates a learning loop. Take a photo after each major assembly stage. When you hit a problem, you can reverse-engineer where it started. In 2026, TikTok’s #PapercraftProgress hashtag rewards timelapses of budget kit builds, and the algorithm surfaces creators who specialize in affordable projects. This isn’t just vanity—public documentation makes you more meticulous, and community feedback accelerates skill gain. Keep a simple log: date, kit name, time spent, pieces miscut. Patterns emerge that guide your next purchase.
Troubleshooting Common Issues
Warping and Curling Paper
Humidity is paper’s nemesis. In 2026’s climate-varied world, even indoor AC can’t prevent moisture absorption. If pieces curl after cutting, iron them flat: place between two sheets of parchment paper and press with a dry iron on the lowest setting for 3 seconds. For structural warping (like a wall that bows), reinforce the back with strips of clear packing tape before assembly. The tape acts as a moisture barrier and adds rigidity without visible bulk. Prevention beats cure: store unused sheets in a ziplock bag with a silica gel packet.
Weak Joints and Structural Failures
A collapsed model usually means insufficient glue surface area or wrong glue type. For budget kits, skip the included glue stick for load-bearing joints. Use a liquid glue with a brush applicator and coat the entire tab, not just the edges. For extra strength, create a “glue sandwich”: apply glue to both the tab and the receiving slot, let tack up for 30 seconds, then press together. In 2026, some crafters are using cornstarch paste (yes, homemade) for paper-to-paper bonds; it’s slower but creates a weld-like joint that flexes instead of cracking.
Faded or Misaligned Prints
If your kit arrives with faded sections, it’s a manufacturing defect—contact the seller for a replacement PDF. For minor misalignment, don’t force pieces to match the print; trust the cut lines. Use a light pad to trace the correct shape onto the backside if needed. In 2026, reputable brands offer “digital backup” guarantees: email them a photo of the defect and they’ll send a printable file within 24 hours. This is a feature worth prioritizing in budget kits, where quality control is spottier. Always scan your sheets immediately upon opening; this creates your own backup if the brand’s support is slow.
When to Upgrade from Budget Kits
Recognizing Your Skill Plateau
You’ll know it’s time to graduate when you can complete a budget kit in half the stated time without errors. Another sign: you’re modifying kits—changing colors, adding details, or redesigning weak joints. When the kit’s limitations frustrate you more than your own skill gaps, you’ve outgrown the budget tier. This usually happens after 8-12 builds. Don’t rush it; the plateau is where mastery solidifies. Stay in budget kits until you can consistently produce pieces that look better than the product photos.
Investing in Specialized Tools
Your first major purchase should be a precision cutting machine like a Silhouette or Cricut. In 2026, entry models are under $150 and pay for themselves after 10 kits if you’re buying PDF patterns instead of pre-printed. But here’s the secret: wait for a holiday sale and buy a refurbished unit. The technology hasn’t changed dramatically, and refurbished machines come with warranties. Before that, upgrade your glue to a pH-neutral PVA bookbinding adhesive; it’s archival quality and won’t yellow your builds over time.
Exploring Premium Pattern Sources
Once you’re comfortable, premium PDF patterns from independent designers offer more creativity per dollar than physical kits. A $8 pattern file can be printed multiple times, letting you iterate and experiment. In 2026, platforms like Gumroad and Ko-fi host papercraft designers who sell “kit builder bundles”—patterns plus video tutorials—for $10-15. This is the true next step: paying for intellectual property, not just paper and ink. Your $20 budget now buys two digital patterns and a ream of quality cardstock, yielding 5-6 projects instead of one.
Building Your Papercraft Roadmap
Setting Realistic 30-Day Goals
Don’t aim to build 10 kits in a month. Instead, target three kits with specific skill focuses: Kit 1 for straight folds, Kit 2 for curves, Kit 3 for multi-part assembly. Between kits, spend two days practicing the next skill on scrap paper. This spaced repetition locks in muscle memory. In 2026, habit-tracking apps have papercraft-specific templates where you log daily 15-minute practice sessions. The goal isn’t output volume; it’s skill density. One perfect build teaches more than five rushed ones.
Tracking Improvement Metrics
Measure what matters: cutting accuracy (are your edges clean?), fold crispness (do lines stay straight?), and assembly time (are you getting faster?). Create a simple rubric: rate each build 1-5 on these three factors. After five kits, chart your scores. You’ll see patterns—maybe your folds are perfect but cutting lags. This data directs your practice. In 2026, some crafters use smartphone macro lenses to photograph edge quality, creating a visual progress log that’s more honest than memory.
Planning Your Next Skill Milestone
Your roadmap should have clear waypoints: master basic folds → build a freestanding model → work with curved surfaces → design simple modifications → create original pieces from scratch. Each waypoint should have a budget kit category assigned. For curved surfaces, a floral kit. For modifications, an architectural kit with simple geometry. This intentionality prevents random purchasing and ensures each $20 investment serves your growth. The 2026 market is vast; without a roadmap, you’ll drown in pretty options that don’t build skills.
Frequently Asked Questions
1. Can I really get a quality papercraft kit for under $20, or am I setting myself up for frustration?
Absolutely, but you need to vet carefully. In 2026, manufacturing advances have made decent kits at this price point common, but quality control varies wildly. Focus on piece count (20-40 pieces), paper weight (200+ gsm), and instruction clarity (vector diagrams, not just photos). Read reviews specifically mentioning “first kit” experiences. The sweet spot is $14-18; below $12, you’re gambling on paper that tears when folded.
2. What’s the difference between a $12 kit and an $18 kit at this budget level?
That $6 jump typically buys you scored folds, better paper, and AR-enhanced instructions. The $12 tier often uses lighter paper (180gsm) and includes only a glue stick. At $18, expect 250gsm cardstock, a glue pen, and digital backup access. The most significant difference is error tolerance: expensive budget kits have redundant tabs and clearer registration, so mistakes are recoverable. With $12 kits, one miscut can doom the project.
3. Do I need to buy tools separately, or can I start with just the kit?
You’ll need at least a craft knife and cutting mat, which adds $10-12 if you don’t own them. Some 2026 kits include a basic knife, but they’re rarely sharp enough for clean cuts. The honest answer: budget $25 total for your first build ($15 kit + $10 tools). After that, tools are reusable. If you’re truly cash-strapped, start with a pre-cut kit and use kitchen scissors and school glue, accepting that results will be rough but learning will still happen.
4. How long should my first kit take to complete?
Plan for 2-3 times the box’s stated time. A kit claiming “60 minutes” will realistically take 2-3 hours for a beginner. This includes organizing pieces, understanding instructions, and fixing mistakes. Don’t marathon it; split into two sessions. Fatigue after 90 minutes leads to sloppy cuts. The 2026 trend of “micro-kits” (15-minute builds) is perfect for learning time management without the pressure of a multi-hour commitment.
5. What’s the most common mistake beginners make with budget kits?
Choosing kits with too many pieces because they look impressive. A 150-piece dragon seems exciting until you’re 3 hours in with a confusing torso section and no clear path forward. Start simple. The second mistake is ignoring grain direction—folding against the grain creates cracks that weaken the whole model. Always check for grain arrows on the sheet margins; if absent, test a scrap piece first.
6. Can I fix a piece if I cut it wrong?
Yes, but prevention is easier. Keep all scraps until the project is done; a miscut piece can often be patched from off-cuts using tiny glue tabs. For structural pieces, reinforce the back with clear tape before cutting—if you slip, the tape holds the piece together. In 2026, some brands include “spare” sheets of critical pieces, but this is rare. Photograph the sheet layout before cutting; this helps you identify which scraps match which piece if you need to reconstruct.
7. Are digital PDF kits cheaper than physical kits?
Long-term, yes. A $8 PDF plus $5 in cardstock yields 3-4 builds for $13 total. But for your first 1-2 kits, physical is better. You avoid printer alignment issues, paper weight guesswork, and the hidden cost of ink. PDFs shine once you know what 250gsm feels like and can calibrate your printer. In 2026, many designers sell “print-then-cut” bundles optimized for home printers, but you need a printer that handles heavy cardstock without jamming.
8. How do I know if a kit’s instructions are good before buying?
Check reviews on YouTube and crafting forums for “build-through” videos. Search the kit name plus “instructions” or “review.” Good signs: icons instead of language-dependent text, fold direction indicators (mountain/valley symbols), and separate “exploded view” diagrams for complex steps. In 2026, reputable brands post PDFs of instructions online; preview them before purchasing. If the instructions are blurry, the kit will be frustrating. Also, look for a “difficulty rating” that matches your skill—avoid anything rated above 2/5 for your first build.
9. What should I do with finished models? How do I store or display them?
Paper is vulnerable to dust, sun, and humidity. For display, spray finished models with a clear matte acrylic sealer (Krylon or Mod Podge, $5-6). This adds rigidity and UV protection. For storage, use clear plastic shoeboxes with silica gel packets. Never store in attics or basements; temperature swings cause warping. In 2026, some crafters use “shadowbox frames” from dollar stores to protect builds from dust while showing them off. For truly precious pieces, invest in a small display case with a desiccant compartment.
10. When am I ready to move beyond budget kits?
You’ll know when you start modifying kits before building—thinking, “This would look better in blue,” or “That joint needs reinforcement.” When the kit’s limitations frustrate you more than your technique, you’ve outgrown the tier. Another sign: you can complete a budget kit flawlessly in under an hour. At that point, your time is better spent on premium PDF patterns where you control materials. Most people hit this after 8-12 budget builds. Don’t rush; master the fundamentals on cheap paper before investing in $30+ kits.