Table of Contents
If you’ve ever run your fingers across a beautifully embossed card and felt those intricate peaks and valleys catch the light, you know the magic of dimensional texture. Layered embossing takes that magic further, building depth that makes designs literally rise from the surface. But here’s what separates the amateurs from the artisans: the right stencil. Not all embossing stencils are created equal, especially when you’re aiming for those sophisticated multi-level effects that make viewers do a double-take. This year’s crafting landscape offers more options than ever, and knowing what features actually matter will transform your projects from flat to phenomenal.
Whether you’re creating wedding invitations that feel like luxury stationery or adding architectural detail to mixed-media art, understanding stencil construction, material science, and design compatibility is non-negotiable. Let’s dive deep into what makes an embossing stencil truly exceptional for layered techniques, so you can invest wisely and create confidently.
Top 10 Embossing Stencils For Layered Effects


Detailed Product Reviews
6. Sizzix Layered Stencils 4PK -Flowers by Olivia Rose, 665261

Overview: The Sizzix Layered Stencils 4PK in the Flowers by Olivia Rose design offers crafters a sophisticated approach to creating intricate floral motifs. This set includes four coordinated stencils, each measuring 12.54cm x 12.54cm (approximately 5x5 inches), designed to work together for building dimensional, detailed flower designs. The collaboration with artist Olivia Rose brings a professional, contemporary aesthetic to your paper crafting projects, from card making to scrapbook embellishments.
What Makes It Stand Out: The true innovation lies in the layered system—each stencil builds upon the last, allowing you to create stunning depth and realism with minimal effort. Unlike single-layer stencils, this four-pack guides you through adding highlights, shadows, and intricate details progressively. The delicate floral patterns capture fine botanical details that would be nearly impossible to achieve freehand. Simply wipe clean after use for repeated applications.
Value for Money: As a four-pack from a premium brand like Sizzix, this set offers excellent value compared to purchasing individual layered stencils separately. Each stencil in the collection serves a specific purpose in the layering process, essentially providing a complete floral design system in one package. The reusable nature and durable construction ensure this set will serve your crafting needs for hundreds of projects.
Strengths and Weaknesses: Strengths include the intricate, professional-quality designs, perfect sizing for standard cards and layouts, and the clear layering system that produces stunning dimensional effects. The compact square format maximizes design area while minimizing storage space. Weaknesses include a slight learning curve for beginners unfamiliar with layered stenciling techniques, and the 5-inch size may feel limiting for larger scrapbook pages or home décor projects.
Bottom Line: This Sizzix set is ideal for intermediate to advanced paper crafters seeking professional floral effects without the complexity of hand-drawing. The reusable four-pack system delivers exceptional detail and value, making it a worthy addition to any stenciling collection.
7. Stampers Anonymous Tim Holtz Layered Stencil, 4.125 by 8.5-Inch, Burlap

Overview: The Stampers Anonymous Tim Holtz Layered Stencil in Burlap delivers authentic textile texture to your paper crafts in a convenient 4.125 by 8.5-inch format. This single-layer stencil from the renowned Tim Holtz collection captures the rustic, woven character of real burlap, making it perfect for vintage, farmhouse, and mixed-media projects. Proudly made in the USA, it represents the quality and artistic vision that has made Tim Holtz products staples in the crafting community.
What Makes It Stand Out: The hyper-realistic burlap pattern distinguishes this stencil from generic texture designs. Every weave and fiber is meticulously rendered, creating convincing dimension when layered with inks, paints, or texture paste. The versatile rectangular shape works beautifully for standard cards, journal pages, and tags. The stencil’s durability withstands repeated use with various media, from spray inks to heavy modeling paste, without warping or deteriorating.
Value for Money: While priced at a premium compared to generic stencils, the Tim Holtz brand guarantees exceptional design quality and manufacturing standards. This single stencil offers infinite creative possibilities across countless projects, making the per-use cost negligible. For fans of the Tim Holtz aesthetic, this authentic design element eliminates the need to purchase multiple inferior stencils to achieve similar effects.
Strengths and Weaknesses: Strengths include the highly realistic pattern, robust construction that prevents tearing, versatile size for multiple applications, and the trusted Tim Holtz brand reputation. The made-in-USA quality ensures consistent performance. Weaknesses include the single-design limitation compared to multi-pack sets, and the premium price point may deter budget-conscious crafters. The burlap motif, while versatile, may not suit every project theme.
Bottom Line: This Tim Holtz stencil is a must-have for mixed-media artists and vintage-style crafters seeking authentic texture. The superior quality and realistic design justify the investment, making it an essential tool for creating professional, textured backgrounds.
8. Lapoo Flowers Metal Cutting Die for Scrapbooking - Durable, Cut Stencils for DIY Scrapbook Photo Album Decorative Paper Card, Card Making Supplies, Embossing (Multiple Polka-Dot Boxes 5.2 x 4 in)

Overview: The Lapoo Flowers Metal Cutting Die redefines versatility in paper crafting, offering a durable carbon steel tool that functions as both a precision cutting die and a stencil template. Measuring 5.2 x 4 inches, this polka-dot boxes design creates clean, geometric cutouts perfect for modern card making, scrapbook accents, and decorative paper crafts. Engineered to work with most major die-cutting machines, it provides professional results across various materials including cardstock, chipboard, and specialty papers.
What Makes It Stand Out: Unlike traditional stencils, this dual-purpose tool cuts and stencils simultaneously, streamlining your creative process. The high-carbon steel construction ensures crisp, clean edges cut after cut, while the negative space creates perfect stenciling opportunities. The polka-dot pattern offers contemporary appeal, and the 5.2 x 4-inch size is ideal for card fronts and layered embellishments. Its durability means this single tool will outlast dozens of plastic stencils.
Value for Money: This metal die represents exceptional value for crafters who own die-cutting machines. The dual functionality eliminates the need to purchase separate cutting dies and stenciling templates. The robust carbon steel construction ensures years of reliable service, making the initial investment highly economical over time. Compared to premium brand metal dies, Lapoo offers professional quality at a mid-range price point.
Strengths and Weaknesses: Strengths include remarkable durability, compatibility with most die-cutting machines, dual cutting/stenciling capability, and clean, precise results. The modern polka-dot design suits various occasions. Weaknesses include the requirement of a die-cutting machine, which adds to the overall investment for those without one. The design description is somewhat vague, and the “Flowers” in the title contradicts the polka-dot boxes pattern mentioned in parentheses.
Bottom Line: For die-cutting machine owners, this Lapoo tool is an excellent, versatile addition that combines cutting and stenciling functions. The durable construction and dual-purpose design offer outstanding long-term value for modern paper crafters.
9. Stampers Anonymous THS066 Tim Holtz Layered Stencil, Multi-Colour, 4.125 x 8.5-Inch

Overview: The Stampers Anonymous THS066 Tim Holtz Layered Stencil combines signature artistic style with practical functionality in a unique tag-shaped format. Measuring 4.125 x 8.5 inches, this stencil features a convenient hole at the top for organization and is designed for layering multiple media types including inks, paints, and stains. The multi-purpose design makes it an essential tool for scrapbookers, card makers, and mixed-media artists seeking the distinctive Tim Holtz aesthetic.
What Makes It Stand Out: The clever tag shape with integrated hanging hole solves storage challenges that plague crafters—simply thread onto a cable binder ring (sold separately) to keep your Tim Holtz collection organized and accessible. The stencil is engineered specifically for layering techniques, with a design that builds complexity through successive applications of different media. The versatility extends beyond paper to canvas, wood, and fabric projects, making it a true multi-surface tool.
Value for Money: Positioned in the premium tier, this stencil commands a higher price than generic alternatives but delivers the authentic Tim Holtz design philosophy and proven durability. The innovative storage feature adds practical value, while the multi-surface compatibility maximizes its utility across your entire craft room. For dedicated Tim Holtz enthusiasts, the cohesive design language across products ensures seamless project coordination.
Strengths and Weaknesses: Strengths include the ingenious tag shape with storage hole, exceptional versatility across media types, robust construction that withstands aggressive techniques, and the cohesive Tim Holtz design system. The size is perfect for tags and cards. Weaknesses include the premium pricing and the need to purchase separate binder rings for the storage system. The multi-colour designation refers to usage potential rather than the stencil itself, which may confuse some buyers.
Bottom Line: This Tim Holtz stencil is perfect for organized crafters who value both form and function. The tag shape and storage hole make it stand out, while the layering design delivers professional mixed-media results worthy of the investment.
10. Ammsochy Cutting Dies 3D Background Frame Metal Stencils Scrapbooking Tools DIY Craft Carbon Steel Embossing Template for Paper Card Making Album Arts Supplies (Diamond Set)
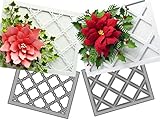
Overview: The Ammsochy Cutting Dies 3D Background Frame set revolutionizes dimensional paper crafting with two precision-engineered carbon steel dies designed to create stunning layered backgrounds. The diamond pattern set measures 5.6 x 4.4 inches and allows crafters to produce either simple embossed designs or complex 3D layered effects. This versatile tool set works with most die-cutting machines to transform flat cardstock into intricate, professional-quality backgrounds for cards, scrapbooks, and paper art projects.
What Makes It Stand Out: The two-piece design enables unprecedented creative flexibility—use each die separately for subtle texture or combine them for dramatic three-dimensional depth. This layering capability creates true 3D backgrounds that pop off the page, eliminating the need for foam tape and multiple cutting steps. The diamond geometric pattern offers timeless elegance suitable for any occasion, from weddings to holiday cards. The robust carbon steel construction ensures every cut is crisp and precise, even through heavyweight cardstock.
Value for Money: Offering two coordinated dies in one package, this set delivers exceptional value compared to purchasing individual background dies. The 3D layering capability essentially provides three tools in one (two single dies plus the combined effect), maximizing your creative options while minimizing storage requirements. The durable carbon steel construction ensures this set will remain a staple in your craft room for years, amortizing the initial cost across hundreds of projects.
Strengths and Weaknesses: Strengths include the innovative two-die 3D system, premium carbon steel durability, versatile sizing for standard cards, and the elegant diamond pattern. The ability to create true dimension without bulk is revolutionary. Weaknesses include the requirement of a compatible die-cutting machine and adequate cutting pressure for clean results. The 5.6-inch width may challenge smaller machines. Beginners might need practice to align layers perfectly for the 3D effect.
Bottom Line: This Ammsochy die set is a game-changer for crafters seeking professional dimensional backgrounds. The 3D layering capability and dual-die value make it an essential investment for serious card makers and scrapbookers.
Understanding Layered Embossing and Stencil Fundamentals
What Makes Layered Embossing Different?
Single-pass embossing creates one uniform level of dimension, but layered effects build a topography of texture. Think of it as sculpting with pressure rather than clay. Each successive layer adds height, creating shadows and highlights that mimic hand-tooled leather or wrought iron. The stencils you choose must accommodate this cumulative pressure without degrading, warping, or losing registration between passes.
The Science Behind Multi-Level Dimension
Professional-grade layered embossing relies on precise depth control. Each layer typically ranges from 0.5mm to 2mm in relief, and quality stencils engineer these increments deliberately. The physics involves distributing pressure across multiple elevations while preventing paper fiber breakdown. This is why stencil rigidity and pattern engineering matter more than aesthetics alone.
Key Material Considerations for Quality Stencils
Plastic vs. Metal: Pros and Cons
Plastic stencils offer flexibility and affordability, making them gentle on manual machines. Look for high-density polyethylene or PETG plastics that resist cracking under repeated pressure. Metal stencils, typically brass or aluminum, provide unmatched durability and crisp detail transfer. They’re heavier and require careful sandwich adjustment but maintain perfect flatness for dozens of projects. Your choice depends on project volume and machine type.
Optimal Thickness for Depth Variation
For layered effects, stencil thickness directly impacts your dimension range. Thinner stencils (0.3mm) excel for subtle background textures, while thicker options (0.8mm to 1.2mm) create bold focal points. The sweet spot for most multi-layer work is a set that includes varied thicknesses, allowing you to build from delicate to dramatic without switching materials mid-project.
Design Features That Enhance Layering
Registration Marks and Alignment Systems
The difference between a professional finish and a craft-fair flop often comes down to registration. Quality layered stencils incorporate subtle alignment guides—tiny crosses or corner brackets—that disappear into your final design but ensure perfect layer placement. Some advanced sets use corner notches that mate with carrier sheets, eliminating guesswork entirely.
Pattern Complexity vs. Usability
Intricate filigree patterns look stunning, but overly dense designs trap paper fibers and cause tearing during multi-pass embossing. The best layered stencils balance detail with open space, providing “rest areas” where paper can relax between pressure points. Look for patterns where line weights vary intentionally, creating natural hierarchy in your layers.
Size, Scale, and Project Compatibility
Standard Dimensions for Common Projects
Most cardmakers work with A2 (4.25" x 5.5") or A7 (5" x 7") formats. Stencils sized to these proportions minimize waste and alignment headaches. Border patterns should span at least 6 inches to accommodate both portrait and landscape orientations without repositioning. For layering, oversized stencils give you creative cropping options but require more storage space.
Oversized Stencils for Statement Pieces
When creating journal covers, scrapbook pages, or home décor, 12" x 12" stencils become essential. These larger formats demand superior material rigidity—flexing across a wide area creates uneven pressure distribution. Check that oversized options include reinforced edges or gridlines for accurate sub-section embossing.
Machine Compatibility and Technical Requirements
Manual Embossing Machines
Classic manual machines like the Big Shot or Cuttlebug require specific stencil thicknesses to maintain proper sandwich tension. Too thick, and you’ll crack plates; too thin, and you won’t get adequate depth. For layered work, you’ll need to adjust your shim stack between passes, so stencils with etched thickness indicators save serious trial-and-error time.
Electronic Die-Cutting Systems
Digital machines such as the Gemini or Spellbinders Platinum offer adjustable pressure settings, making them ideal for layered embossing. However, they demand perfectly flat stencils—any warp causes sensor errors. Look for stencils with beveled edges that feed smoothly and anti-static coatings that prevent cling-related misfeeds.
Understanding Sandwich Configurations
The “sandwich” (stencil, paper, plates) is your pressure delivery system. For multi-layer effects, you’ll create different sandwiches for each pass. Quality stencil sets often include a reference chart suggesting base plate combinations. This isn’t just convenient—it prevents the costly mistake of crushing delicate patterns with excessive pressure.
Building Dimension: Techniques for Success
Sequential Layering Strategies
Professional crafters don’t randomly stack layers. They plan progression: base texture, mid-level detail, top-layer accents. Your stencils should support this workflow with numbered systems or visual depth indicators. Some sets color-code layers, letting you grab the right level without consulting instructions.
Positive and Negative Space Dynamics
Layered embossing plays with both raised and recessed areas. Superior stencil designs consider the negative space between elements, ensuring each layer’s valleys become the next layer’s peaks. This interplay creates complexity without clutter. Test this by holding a stencil to the light—well-designed patterns show balanced light transmission.
Versatility in Design Applications
From Subtle Texture to Bold Dimension
The most valuable stencil collections span style spectrums. A single set might include a barely-there linen weave (0.5mm), a medium geometric (1.2mm), and a bold botanical (2mm). This versatility means you can create cohesive suites—imagine wedding invitations with matching subtle envelope liners and dramatic main cards using the same design family.
Mixing and Matching Stencil Collections
Advanced users combine unrelated stencils for custom effects. This requires understanding pattern scale compatibility. A large damask pairs poorly with tiny polka dots, but a large flourish works beautifully with medium-scale script. Look for stencils with modular elements—corner motifs that can become central elements when scaled.
Maintenance and Care for Longevity
Cleaning Protocols for Different Materials
Plastic stencils need gentle soap and cool water; heat warps them. Metal stencils tolerate alcohol wipes for adhesive removal but require immediate drying to prevent oxidation. For both, soft-bristled brushes reach into crevices without scratching. Never soak stencils—moisture seeps under edges and delaminates coatings.
Storage Solutions to Prevent Damage
Layered embossing stencils must stay perfectly flat. Even slight warping ruins alignment. Store them in rigid, acid-free portfolios or flat file drawers. For metal stencils, separate each with parchment paper to prevent scratching. Plastic stencils benefit from anti-static sleeves that repel dust and fibers.
Budgeting Wisely: Value vs. Investment
Multi-Use Sets and Cost Efficiency
A three-stencil set costing $30 that creates 50 layered combinations offers better value than ten individual $5 stencils with limited use. Calculate cost-per-layer-combination rather than price-per-stencil. Sets designed for mix-and-match layering often include versatile “bridge” stencils that transition between bold and subtle patterns.
When Premium Features Justify Higher Prices
Laser-cut registration holes, thickness etching, and anti-static coatings add cost but save hours of frustration. If you emboss weekly, these features pay for themselves in reduced waste and faster workflow. For occasional crafters, mid-range options with manual alignment work fine. The key is honest assessment of your crafting frequency.
Common Pitfalls and How to Avoid Them
Beginner Mistakes That Compromise Results
The most frequent error is insufficient paper weight. Layered embossing demands 110lb cardstock minimum; anything lighter tears at layer three. Another mistake is skipping the “resting” step—paper fibers need 10-15 minutes between passes to regain structure. Quality stencils can’t compensate for rushing the process.
Troubleshooting Alignment Issues
If layers drift, check three things: stencil warp, paper slippage, and plate wear. Even quality stencils develop micro-warps after 20+ uses. Rotate them 180 degrees between projects to distribute wear. Use low-tack tape on stencil corners—not your paper—to prevent shifting without residue.
Advanced Professional Techniques
Creating Custom Layered Combinations
Pros often mask portions of stencils with painter’s tape to create hybrid designs. This requires stencils with wide enough borders to accommodate tape without obscuring design elements. Some stencil makers now include “blanking plates”—solid inserts that block sections for custom negative space.
Integrating with Other Media
Layered embossing doesn’t exist in isolation. The best stencils work with inks, foils, and pastes applied between layers. Look for stencil designs with “ink windows”—open areas where you can sponge color without affecting embossed sections. This multi-media compatibility multiplies a stencil’s value exponentially.
Current Design Trends and Seasonal Motifs
This year’s aesthetic leans toward organic, flowing patterns with Art Nouveau influences. Layered stencils reflecting this trend feature asymmetrical vines and graduated dot patterns that build from sparse to dense. Seasonal collections now include “transition stencils”—designs that work for both fall and winter by layering different color palettes over the same base texture.
Frequently Asked Questions
What’s the difference between single-layer and multi-layer embossing stencils?
Single-layer stencils create one uniform depth across the entire design. Multi-layer stencils are engineered with varying thicknesses or are part of a coordinate system designed to be used sequentially, building dimension step-by-step. They often include registration marks and are made from more durable materials to withstand repeated pressure.
Can I use regular stencils for layered effects?
Technically yes, but results will be inconsistent. Standard stencils lack the precise depth calibration and alignment systems that make layered embossing reliable. You’ll spend excessive time experimenting with shims and likely produce warped or misaligned textures. For professional results, invest in stencils specifically designed for layering.
How many layers can I realistically achieve before paper tears?
With 110lb cardstock and proper technique, four distinct layers are achievable. Six layers push the limits even with 130lb watercolor paper. The key is allowing rest time between passes and using stencils that distribute pressure evenly. Quality stencils with rounded embossing edges reduce fiber stress, extending your layering capacity.
Do I need a special embossing machine for layered techniques?
Not necessarily, but electronic machines with adjustable pressure settings make the process far more forgiving. Manual machines work perfectly if you master sandwich configuration and use high-quality plates. The machine matters less than understanding its pressure curve and maintaining consistent plate condition.
Why are my layers not aligning properly?
Misalignment stems from three primary issues: stencil warp, paper shift, or inconsistent sandwich pressure. First, check your stencil on a flat surface for even a slight curve. Next, ensure you’re taping the stencil—not the paper—to your base plate. Finally, verify that your cutting plates aren’t bowed from overuse, as this creates uneven pressure distribution.
How do I prevent paper tearing during multiple passes?
Use a light mist of water on your cardstock before the first pass—this relaxes fibers. Always emboss with the paper grain running parallel to your feed direction. Between layers, place your project under a heavy book for 10 minutes to let fibers recover. Finally, ensure your stencil edges are beveled; sharp edges act like blades under pressure.
What’s the best stencil material for beginners?
Start with high-density plastic stencils around 0.8mm thick. They’re forgiving on manual machines, affordable for experimentation, and won’t damage plates if you over-shim. Once you’ve mastered registration and pressure control, graduate to metal stencils for finer detail and durability.
Can I create my own layered stencil designs?
Absolutely, but it requires precision tools. Laser-cut Mylar or metal flashing works for single-layer custom stencils. For true layering, you’ll need to engineer depth variations using multiple material thicknesses or create a series with registration holes. Professional stencil makers use CAD software to ensure pressure distribution—a steep learning curve for hobbyists.
How do I clean intricate stencil patterns without damaging them?
For plastic, use a soft makeup brush with mild dish soap, working from the center outward. Metal stencils can handle ultrasonic cleaners for deep cleans, but dry them immediately. Never use pins or needles to poke out paper bits; this creates micro-scratches that catch fibers. Instead, use adhesive putty to gently lift debris from detailed cutouts.
Are expensive stencils really worth the investment?
If you emboss more than twice a month, yes. Premium stencils feature anti-static coatings that reduce fiber cling, laser-etched depth indicators that speed up workflow, and reinforced edges that prevent warp. Calculate your cost per use: a $25 stencil used 50 times costs $0.50 per project. A $5 stencil that warps after five uses costs $1 per project and produces inferior results.