Table of Contents
There’s something magical about watching a child’s face light up when they press down on a shape punch and a perfect star, heart, or dinosaur emerges from ordinary paper. That moment of transformation—where a simple sheet becomes something extraordinary—captures the essence of creative play. Yet as any parent or educator knows, fueling that creativity can quickly strain a craft budget, especially when specialty tools enter the picture.
The good news? You don’t need to spend a fortune to build an impressive collection of shape punches that will keep kids engaged for hours. While premium crafting tools can cost upwards of $20-30 per punch, the market is filled with surprisingly robust options under $15 that deliver clean cuts, safe operation, and lasting durability. The key lies in knowing what features actually matter for young users and which specifications are merely marketing fluff. This guide cuts through the noise to help you identify budget-friendly punches that truly punch above their weight class.
Top 10 Shape Punches For Kids Crafts

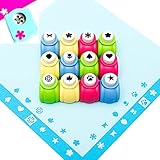
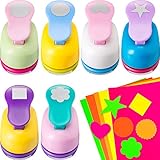
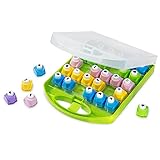


Detailed Product Reviews
Why Shape Punches Are Essential for Kids’ Crafts
Cognitive and Motor Skill Development
Shape punches do far more than create pretty cutouts—they’re powerful developmental tools disguised as fun. When children align paper, apply pressure, and release, they’re engaging in a complex sequence that builds bilateral coordination, hand-eye precision, and spatial reasoning. Each successful punch reinforces cause-and-effect understanding while the resulting shapes become manipulatives for sorting, patterning, and storytelling activities. Unlike digital activities, the tactile feedback from physical crafting creates neural pathways that support writing readiness and mathematical thinking.
Budget-Friendly Crafting Without Compromise
The misconception that inexpensive tools must be inferior has kept many families from exploring affordable options. Modern manufacturing techniques have democratized quality, allowing budget punches to feature safety mechanisms and sharp cutting edges that rival premium brands. The trick is recognizing which cost-cutting measures are acceptable—like simplified packaging or basic color schemes—versus red flags such as exposed metal edges or weak springs. A well-chosen $12 punch can outlast and outperform a poorly designed $25 model, making price an unreliable quality indicator.
Safety First: Non-Negotiable Features
Blade Guarding and Child-Safe Designs
Even at budget price points, effective blade concealment isn’t optional. Look for punches where cutting mechanisms are fully enclosed within the housing, leaving no gaps where tiny fingers could probe. The best designs position the blade at least 8mm from any opening, with spring tension that’s strong enough to return the mechanism but not so powerful that it snaps dangerously. Test the punch yourself before handing it to a child—if you can touch any sharp component through the bottom opening, it’s not child-safe regardless of the age rating on the package.
Non-Slip Bases and Stability Features
A punch that slides across the table during use creates frustration and potential injury. Quality budget models incorporate rubberized feet or textured bottom surfaces that grip even smooth tabletops. For younger children (ages 4-6), consider punches with suction cup bases that temporarily anchor to the work surface. These features cost manufacturers pennies to add but dramatically improve safety and user success rates, making them hallmarks of thoughtfully designed budget tools.
Mechanism Types: Pros and Cons
Lever-Action Punches
The traditional lever design, where you press down on a handle that pivots from a hinge point, offers mechanical advantage that reduces the force needed. For kids, this translates to easier operation on thicker paper. However, not all levers are created equal—budget versions may use plastic axles that wear quickly. Inspect the pivot point for metal reinforcement, and test the lever’s range of motion. A full 90-degree press indicates better engineering than models that require awkward partial compression.
Squeeze and Press Designs
These handheld punches, operated by squeezing like a stapler, excel at portability and storage but demand more hand strength. For children under seven, they can cause fatigue during extended crafting sessions. The advantage lies in their compact size and lower price point—often $3-8 each. When evaluating squeeze punches, check for ergonomic finger grooves and return springs that engage smoothly without catching. The best budget versions use dual springs for balanced pressure distribution.
Spring-Loaded Return Systems
The internal spring is the unsung hero of any punch, and budget models live or die by its quality. A weak spring leads to incomplete cuts and manual blade retraction, while an overly stiff spring makes operation difficult for small hands. The sweet spot uses a progressive tension spring that builds resistance gradually. You can test this by pressing slowly—if the resistance increases smoothly rather than in sudden jumps, the spring mechanism is well-designed. Some budget punches now use silicone dampeners to soften the return, a premium feature that’s trickled down to lower price tiers.
Shape Selection for Maximum Versatility
Essential Starter Shapes
When building a collection on a budget, prioritize shapes with infinite creative potential. Circles in multiple sizes serve as faces, wheels, planets, and flower centers. Stars work for holidays, rewards charts, and night sky scenes. Hearts transcend Valentine’s Day to become leaves, butterfly wings, and decorative elements year-round. These three shapes alone can support hundreds of projects, making them the foundation of any smart budget craft arsenal.
Educational and Alphabet Options
Letter and number punches under $15 typically feature simpler fonts but remain highly functional for learning activities. Look for sets where characters detach cleanly without tiny interior pieces that tear easily. The best educational punches include basic punctuation—commas, periods, question marks—that expand storytelling possibilities. While individual letter punches take up more storage space than strip-style cutters, they offer better control for young users and eliminate the alignment frustration that comes with sliding mechanisms.
Seasonal and Thematic Varieties
Rather than buying single-theme punches for each holiday, seek versatile shapes that adapt across seasons. A snowflake punch works for winter crafts but also becomes a starburst or flower with creative coloring. Leaves can be autumn decorations or flower petals. Animals with simple silhouettes—cats, dogs, butterflies—transition between story-based projects and decorative elements. This multi-use approach stretches your budget further while teaching kids to think creatively about repurposing materials.
Material Compatibility and Limitations
Paper Weight Guidelines
Budget punches typically handle 65-80 lb. cardstock reliably, with some robust models managing lightweight chipboard. The critical specification is the cutting depth, rarely advertised but easily tested. Insert a folded sheet of standard 20 lb. copy paper—if it cuts cleanly through four layers (equivalent to 80 lb. weight), the punch will serve most kids’ craft needs. Be wary of manufacturer claims about “heavy-duty” capability under $15; these often refer to the housing strength, not blade quality.
What to Avoid with Budget Tools
Never test budget punches on materials beyond their designed capacity. Laminated paper, adhesive-backed vinyl, and foam sheets thicker than 1/16" will dull blades irreversibly. Glitter cardstock, while tempting, acts like sandpaper on cutting edges, drastically reducing lifespan. Metallic foils can separate and stick to blades, causing jams. Teach children to check material thickness by bending—if it feels stiffer than a standard greeting card, it’s probably too much for sub-$15 punches.
Layering Techniques for Advanced Projects
Skilled crafters can work around weight limitations through strategic layering. Punch shapes from thin paper, then glue them to cardstock backings for added dimension. This approach actually offers more creative flexibility—mixing patterns, creating ombre effects, and combining textures—while protecting your punch investment. For dimensional projects, consider punches that create scored lines or partial cuts, features increasingly common in budget lines.
Ergonomics and Child-Friendly Design
Grip Size and Hand Strength
A punch handle designed for adult hands creates leverage problems for children. Ideal kid-friendly grips measure 3-4 inches in circumference, allowing small fingers to wrap securely. Contoured surfaces with slight texturing prevent slippage without requiring a death grip. For children with developing hand strength or motor challenges, look for punches with extended lever arms that increase mechanical advantage—these often cost the same as standard models but require 30-40% less pressing force.
Left-Handed Considerations
Most budget punches assume right-handed users, but some thoughtful designs accommodate both. Ambidextrous models feature symmetrical handles and centered blade placement. For squeeze punches, check that the return spring doesn’t dig into the palm when held in the left hand. If teaching a left-handed child, demonstrate how to position the paper differently to see the cutting window clearly—this simple adaptation often matters more than the tool itself.
Value Strategies: Multi-Packs vs. Individual
Calculating True Cost-Per-Use
A $12 multi-pack containing five punches seems like better value than a single $10 punch, but only if you’ll use all the shapes. Before buying sets, honestly assess whether novelty shapes like “unicorn” or “specific cartoon character” will hold interest beyond initial novelty. Often, investing in three high-quality individual punches—circle, star, heart—delivers better long-term value than a 10-pack where seven shapes gather dust. Track which shapes your child reaches for repeatedly to inform future purchases.
Building a Collection Strategically Over Time
Rather than buying everything at once, adopt a “project-based purchasing” approach. Start with foundational shapes, then add one new punch per month based on upcoming projects. This method spreads costs, prevents storage overwhelm, and builds anticipation. Many families find that involving children in the selection process—“What shape would help us make those animal masks?"—teaches decision-making and ensures each new punch gets immediate use.
Maintenance and Longevity Tips
Proper Cleaning Techniques
Paper dust and adhesive residue are the enemies of smooth operation. Every 50 uses, tap the punch upside-down to dislodge debris. For sticky buildup, use a dry toothbrush to clean around the blade housing—never insert metal objects. A single drop of sewing machine oil on the pivot point annually keeps mechanisms moving freely. These simple steps can double the lifespan of budget punches, making that sub-$15 price even more economical.
Storage Solutions That Prevent Damage
Tossing punches in a bin causes blades to bump against each other, creating nicks and dull spots. Store them upright in a desk organizer, or thread them onto a carabiner clip hung on the wall. For collections exceeding ten punches, a hanging shoe organizer with clear pockets keeps shapes visible and protected while using zero desk space. The small investment in proper storage pays dividends in tool longevity.
Troubleshooting Common Issues
When punches start producing fuzzy edges rather than clean cuts, the blade isn’t necessarily dull—it might be misaligned. Place a single layer of aluminum foil on the cutting pad and punch several times; the foil’s slight abrasiveness can realign microscopic blade imperfections. For persistent problems, disassemble the punch (most budget models use simple screw construction) to remove trapped paper slivers that interfere with the cutting action.
Creative Applications Beyond Basic Paper Crafts
Educational Games and Activities
Transform shape punches into learning manipulatives. Punch numbers from colored paper, then have children arrange them on a timeline. Create a memory game by punching pairs of shapes from different patterned papers. For early readers, punch letters to build sight words on a felt board. These activities cost pennies but deliver the same educational value as expensive store-bought kits, while allowing customization to your child’s specific learning level.
Mixed Media Possibilities
Budget punches aren’t limited to paper. Thin craft foam, leaves pressed for 24 hours, even flattened cupcake liners can become punchable materials. Experiment with punching shapes from magazines for collage work, or create stencils by punching through cardstock and using the negative space for painting. This versatility teaches resourcefulness and expands creative horizons without requiring additional tool investment.
Party Crafts and Decorations
A single star punch and stack of construction paper can generate enough decorations for an entire birthday party. Punch shapes from double-sided cardstock to create hanging mobiles, or string punched circles onto yarn for custom garlands. For party favors, let guests punch their own shapes to decorate treat bags. This approach turns the crafting process into entertainment while keeping per-child costs under a dollar.
Frequently Asked Questions
What’s the realistic lifespan of a shape punch under $15?
With proper use and maintenance, quality budget punches last 2-4 years in a home setting, handling roughly 500-1000 cuts. Classroom use reduces this to 1-2 years due to heavier wear. The key is avoiding material abuse and storing tools properly between uses.
Can these punches handle laminated paper for durability?
Most sub-$15 punches struggle with laminated sheets, which effectively double the material thickness. If you must punch laminated items, use the thinnest possible laminating pouches (1.5 mil) and warm the punch with your hands first—cold blades cut less efficiently. For frequent laminated projects, consider investing in one mid-range punch rather than replacing budget models.
How do I know if a punch is truly child-safe versus just marketed that way?
Look for EN71 or ASTM F963 certification marks on the packaging, which indicate third-party safety testing. Physically inspect for blade exposure, test spring tension, and check that there are no small detachable parts for children under three. When in doubt, supervise use for the first ten cuts—any design flaws usually reveal themselves quickly.
Are metal or plastic punches better in the budget category?
Hybrid designs offer the best value—metal cutting blades with plastic housings. All-metal punches under $15 often cut corners on blade quality, while all-plastic models lack durability. The sweet spot uses stainless steel blades riveted to reinforced plastic bodies, providing cutting precision without the cost of full metal construction.
What’s the best way to teach a preschooler to use shape punches correctly?
Start with thin paper (20 lb. copy paper) and large, simple shapes like circles. Demonstrate finger placement, then guide their hands through the first three presses. Create a “punching station” with the tool secured to the table and paper pre-cut to size. Celebrate each successful punch to build confidence, and never force a stuck punch—this teaches bad habits and risks injury.
Can left-handed children use standard shape punches effectively?
Yes, with minor adaptations. Teach left-handed users to position the paper so the cutting window faces them directly, rather than angling the tool. Some squeeze punches work better upside-down for lefties. While true ambidextrous designs exist, they’re rare under $15—technique adjustments usually suffice.
How many layers of paper can I realistically punch at once?
Most budget punches handle 1-2 layers of standard cardstock or 3-4 layers of copy paper reliably. Attempting more stresses the spring and dulls the blade. For classroom settings where volume matters, invest in two identical punches and rotate them rather than overloading a single tool.
Why does my new punch leave fuzzy edges instead of clean cuts?
This usually indicates a manufacturing oil residue on the blade, not a defect. Punch through wax paper 10-15 times to clean the blade, then test on scrap paper. If fuzziness persists, the blade alignment is off—return it immediately, as this defect won’t improve with use.
Are there any materials I should absolutely avoid?
Never punch adhesive materials like stickers or tape-covered paper—the adhesive transfers to the blade and attracts paper dust, creating a gummy buildup. Avoid metallic foils, which can separate and stick, and anything thicker than 1/16 inch. Glitter cardstock acts as abrasive sandpaper on cutting edges, reducing lifespan by 50% or more.
What’s the most cost-effective way to build a versatile collection?
Start with three essential shapes: a 1-inch circle, a medium star, and a simple heart. These cover 80% of typical kids’ projects. Add one new shape monthly based on your child’s interests, choosing versatile designs over trendy characters. Buy during back-to-school sales when prices drop 30-40%, and consider splitting multi-packs with other families to diversify shapes while sharing costs.
